How to Add an Image to your Dmac Media Website

We pride ourselves that our website systems are easy to manage and update. For that reason, adding an image to your Dmac Media Website can be done with just a few short clicks. Once you have chosen the image you would like to add, simply follow the steps outlined below and your new image will be added to your chosen webpage.
Note: The steps outlined in the following How to Guide relate to a Version 3 Dmac Media Content Management System. If you are currently using an older Dmac Media Platform and want to upgrade Speak to an Account Manager Now.
*Dmac Media Version 4 is on the way, register your interest in being among the first to utilise this powerful website system.
Log into the admin area of your website. If you are unsure about how to do this, you can click here and follow the self help guide.
Step 1 – Accessing the website File Manager
Once you’ve logged in, you will want to navigate to the file manager. Much the same as the file explorer on your computer, the file manager allows you to add and remove files such as images & PDF’s to your Website.

Fig 1.2 – Access the file manager by clicking on the “My Files” Icon in the bottom of the Admin section.
Step 2 – Create a Folder & Upload Your Image
Having selected the My Files icon, you will be greeted with a list of folders & files that have already been uploaded to the website. For easy management we recommend you create a folder to hold images that are to be on specific pages. Notice the Thank You Page folder in the image below, which houses all the images used on the Thank You Page. Once you’ve created and named your folder, you can go ahead and click the “+ Upload File” option.

Fig 1. 3 – The My Files Section of the website allows you to create folders and upload files to the website.
Once clicked, a pop up box will appear through which you can add the file. Simply click on the “+ Add File” in the pop up and select your image from the homepage.

Fig. 1.4 – Clicking on “+ Add File” will allow you to select your chosen image from the computer.
Step 3 – Adding an image to your webpage
Having uploaded the image from the computer to your website, it is now time to place it on your desired web page. Once again, this a straightforward and simple process with just a few short steps. Firstly, you’ll need to navigate to the pages list via the page icon in the bottom of the website as shown in fig. 1.5 & 1.6 below.

Fig. 1.5 – Clicking on the Pages Icon will showcase the list of pages currently created on the website.

Fig. 1.6 – To view and edit an individual webpage, simply click on the magnifying glass icon.
Step 4 – Add Your Image where you would like it to appear on the webpage.
Finally, you are ready to add your image to your webpage. First off, you are adding content and should click on the “+ Add Content” button at the top of webpage.

Once clicked, select which section of the web page you want to add the image too. In the example below we are using a single column layout.

Finally, you will want to select the text module from the list of content types to add.

The Text editor allows you to add all manor of content from written text and headings to images, and iFrame Embeds. To add an image, click on the add image icon beside the font size.
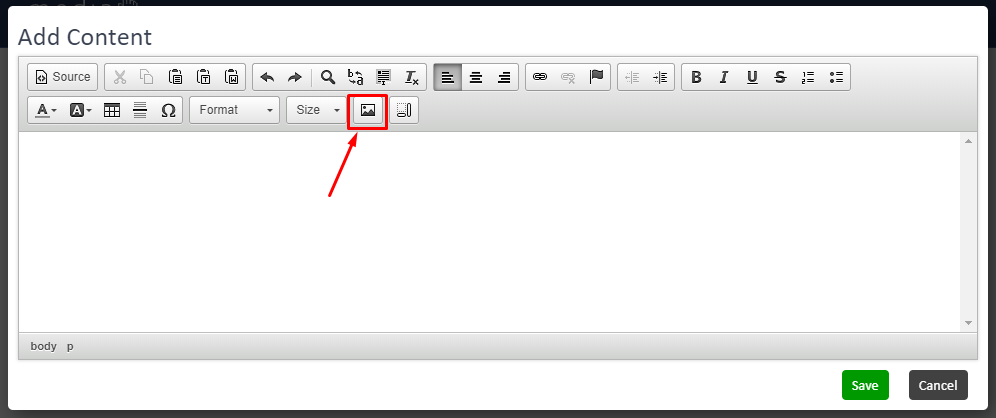
Select the image by clicking on the Browse Server option and choosing the image you have uploaded from the “My Files” Section.
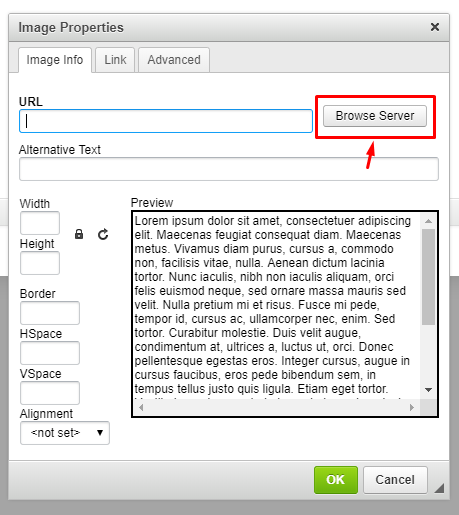
Once added, you can resize the image, apply borders or add space variations. It is also good SEO practice to include alternative text or Alt-Text. The information entered in this field should accurately reflect the image and include a keyword or two where possible. The content entered in the Alt-Text field will display if the image doesn’t load correctly and helps users using technology such as screen readers understand the page.
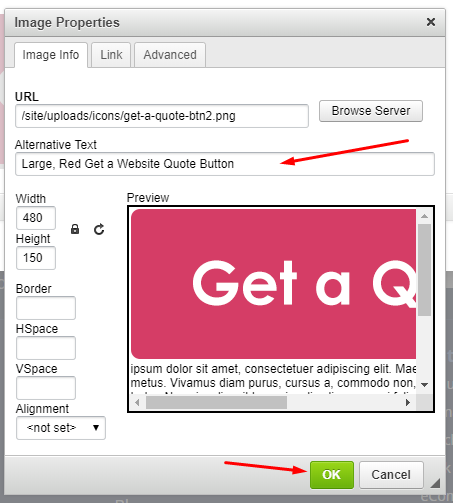
Once all is completed, you can click on the Ok option and the image will appear in the text editor.
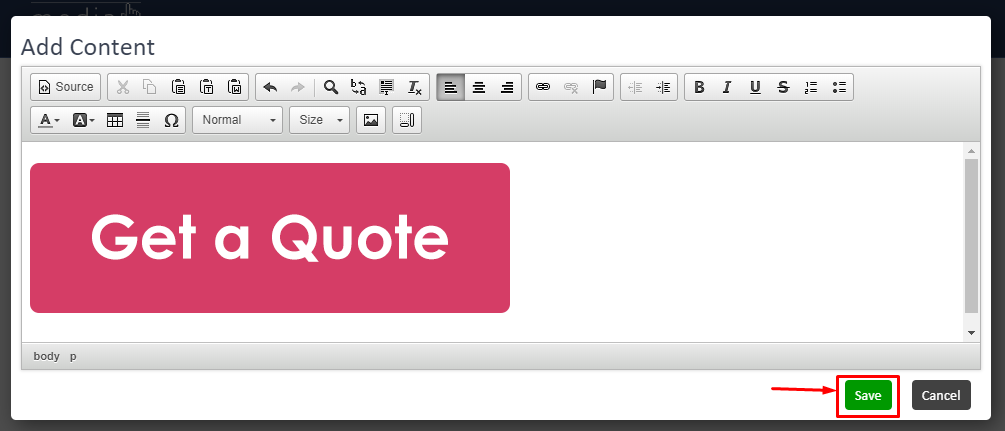
Once you’re happy, you can save this off and the image will appear on the web page.



 Help! Someone Else Owns My Domain Name
 How To Add A Page to Your Dmac Media Website
 Social Media Stories for Business Profiles