A quick way to resize & crop imagery without buying photoshop

So you have found the perfect image but the proportions just don’t fit with your layout!
Fear no more here’s some free tools that allow you to resize and crop imagery. No expensive software or graphic design services required!
Whether you are managing a blog, website or newsletter we all know how a layout can quickly look unprofessional with the wrong shaped images in situ. Taking full control of how your images display is the key to a slick & professional presentation. Images should be consistent and neatly fit in the area you are trying to place them. A landscape image in a portrait sized box always looks awkward and lazy so take 10 minutes to click through these suggestions and give them a go next time your adding an image to your site.
Befunky.com
This is a basic online image editor tool that allows you to resize and crop an image quickly and easily. No login required just click the link and get started www.befunky.com/create/
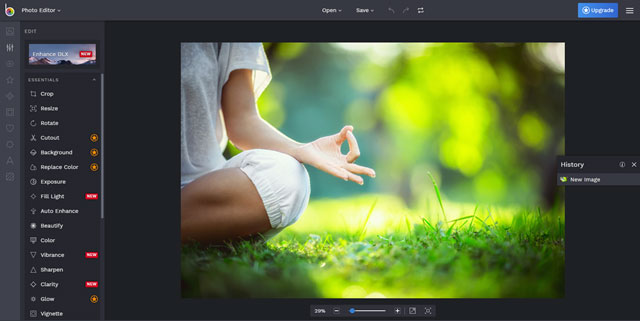
‘Open’ a photo to choose one from your computer. Once you have selected your image a toolbar of options appears to the left…
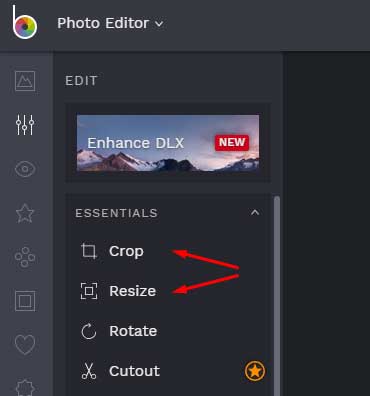
The first two tools are Crop & Resize. I always resize my image first and then crop it to the required dimensions.
Resizing your image.
Images that are too big will slow down your web page. Find out the largest width your image needs to be displayed at and resize down to that pixel(px) amount.
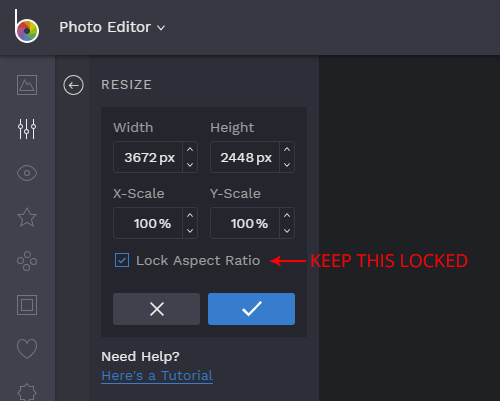
Always ensure that ‘Lock aspect ratio’ is ticked so that your image doesn’t get stretched. Don’t worry if your height is too big, we will crop this next.
Be careful when making a small image bigger as this will result in a loss of quality and may appear pixelated, better just to find an image large enough to do the job.
Cropping your image.
Cropping is the most important tool when trying to make your image the correct size. It allows you to extract a portion of the image in whatever size you need without distorting the image. For example if your website layout needs a square shaped image but your desired image is rectangular, then you can crop out a square shape and trim away the leftovers. It’s best to find out the exact image size required for your layout and just type them into the required fields.

As well as typing in dimensions you can also drag visual guides to your desired size. Have a play around with the options as this will soon become your new best friend!
Save your image
And that’s it. Click on save up the top of your screen and save the image to your computer ready for upload to your website.
Some other tools for resizing imagery
The above tool, BeFunky, is all you need for resizing & cropping but here’s a quick overview of some more online tools I recommend on a regular basis.
Shutterstock Editor
https://www.shutterstock.com/editor
This is very similar to Befunky.com but offers more in terms of design and also gives you some quick templates for creating facebook covers, twitter headers etc. You have to create a free account to use the tools but this is a handy image editor for making quick mock ups.
photopea.com
This is a free online tool based on photoshop. It is more advanced than the tools mentioned above but offers so much more once you get the hang of it. If you are doing a lot of image editing it is worth your while learning the basics. Photopea really comes into its own when you have to quickly resize multiple images to certain dimensions.
Photo Razor.
This is a tool we use a lot in the web industry when we want to reduce the size of an entire folder of images for example a folder of product images that are all way too large to display on web. It allows you to select a folder, set the max width and click go! This is great for bulk resizing of images but not cropping
Photo Razor can be downloaded for free from softsonic here.
If you need a few quick pointers don’t hesitate to get in touch with us at Dmac Media



 Domain names are a new hot commodity – Hang on to yours!
 {Video} How to Improve your Organic Ranking!
 Help – I can’t find my new website on Google